oVirt 3.5 is now in RC5 and soon to be released. When Centos 7 was released back in July, any version of oVirt was primed to take more time than I had to spend on it. Now that much of the work is done and a little time at hand, I took a breath & made the dive.
Initial results were promising, until the hosted engine VM failed repeatedly to boot after installation.
The constant defiant error was “no bootable device”, on the first boot post install.
Enter Fedora 20. Matters improved with a successful hosted VM, but then persistent segfaults from the inbuilt NFS component on the glusterfs-server 3.5.2, released through the Fedora updates repo. Rather than debugging the old, I looked to the new gluster in 3.5.3 Beta1, which thankfully proved to be the worthy of the effort.
In the 3.4 release, the HA hosted engine and direct gluster integration for VM’s delivered huge benefits.
This time around with the soon to be released 3.5 version, one of the features to catch my eye is iSCSI storage domain integration for the hosted engine.
Part1 of the testing will be to take the standard approach of an HA hosted engine, with an underlying highly available clustered gluster file system.
With the baseline of the conventional approach, part2 will detail the iSCSI integration and compare the two.
Edit hosts
Add entries for each node in /etc/hosts.
127.0.0.1 localhost localhost.localdomain localhost4 localhost4.localdomain4
::1 localhost localhost.localdomain localhost6 localhost6.localdomain6
XX.XX.XX.100 node0 node0.redgrid.net
XX.XX.XX.101 node1 node1.redgrid.net
Setup IPTABLES per the release notes
yum install iptables-services
systemctl stop NetworkManager
systemctl disable NetworkManager
systemctl mask NetworkManager
systemctl stop firewalld
systemctl disable firewalld
systemctl mask firewalld
yum install iptables
systemctl enable iptables.service
chkconfig network on
Modify your rule set.
For the purpose of testing and initial setup, it may also serve you well to set selinux to permissive or disabled.
(stolen and modified from Jason Brooks)
:INPUT ACCEPT [0:0]
:FORWARD ACCEPT [0:0]
:OUTPUT ACCEPT [0:0]
-A INPUT -m state –state ESTABLISHED,RELATED -j ACCEPT
-A INPUT -i lo -j ACCEPT
# VRRP – keepalived
-A INPUT -p 112 -j ACCEPT
# vdsm
-A INPUT -p tcp –dport 54321 -j ACCEPT
# SSH
-A INPUT -p tcp –dport 22 -j ACCEPT
# snmp
-A INPUT -p udp –dport 161 -j ACCEPT
# libvirt tls
-A INPUT -p tcp –dport 16514 -j ACCEPT
# guest consoles
-A INPUT -p tcp -m multiport –dports 5900:6923 -j ACCEPT
# migration
-A INPUT -p tcp -m multiport –dports 49152:49216 -j ACCEPT
# glusterd
-A INPUT -p tcp -m tcp –dport 24007 -j ACCEPT
# portmapper
-A INPUT -p udp -m udp –dport 111 -j ACCEPT
-A INPUT -p tcp -m tcp –dport 38465 -j ACCEPT
-A INPUT -p tcp -m tcp –dport 38466 -j ACCEPT
# nfs
-A INPUT -p tcp -m tcp –dport 111 -j ACCEPT
-A INPUT -p tcp -m tcp –dport 38467 -j ACCEPT
-A INPUT -p tcp -m tcp –dport 2049 -j ACCEPT
# status
-A INPUT -p tcp -m tcp –dport 39543 -j ACCEPT
-A INPUT -p tcp -m tcp –dport 55863 -j ACCEPT
# nlockmgr
-A INPUT -p tcp -m tcp –dport 38468 -j ACCEPT
-A INPUT -p udp -m udp –dport 963 -j ACCEPT
-A INPUT -p tcp -m tcp –dport 965 -j ACCEPT
# Ports for gluster volume bricks (default 100 ports)
-A INPUT -p tcp -m tcp –dport 24009:24108 -j ACCEPT
-A INPUT -p tcp -m tcp –dport 50152:50251 -j ACCEPT
-A INPUT -p tcp -m tcp –dport 34865:34867 -j ACCEPT
# Reject any other input traffic
-A INPUT -j REJECT –reject-with icmp-host-prohibited
-A FORWARD -m physdev ! –physdev-is-bridged -j REJECT –reject-with icmp-host-prohibited
COMMIT
Configure Storage
For testing purposes I created a 4 drive raid 0; high risk of failure, but given it’s a test system we’ll get performance and live dangerously in the hope of testing the HA aspects of Gluster, should a drive in either array fail.
If you don’t have access to DNS, you’ll need to configure hosts entries for each of the nodes and also the hosted engine.
On both nodes create your volume & install the gluster components & start the services
mkfs.xfs -i size=512 /dev/md0
mkdir -p /export/md0 && mount /dev/md0 /export/md0
echo “/dev/md0 /export/md0 xfs defaults 0 0” >> /etc/fstab
yum-config-manager –enable updates-testing
wget http://download.gluster.org/pub/gluster/glusterfs/qa-releases/3.5.3beta1/Fedora/glusterfs-353beta1-fedora.repo -o /etc/yum/repos.d/glusterfs-353beta1-fedora.repo
yum install glusterfs{,-server,-fuse,-geo-replication}
edit /etc/glusterfs/glusterd.vol and change the base-port option from 49152 to 50152 or an alternate available higher port, to avoid a conflict that can occur in live migration.
systemctl enable glusterd && systemctl start glusterd
On Node1 probe the 2nd node
gluster peer probe node2
If all goes well we can proceed with creating our brick to store our HA hosted-engine VM.
gluster volume create engine rep 2 transport tcp node1:/export/md0/engine0 node2:/export/md0/engine1
gluster volume start engine
HA Config
In order to keep the new file system online, should one of our nodes die or require maintenance, an HA Agent is required.
Options here are CTDB, keepalived or possibly Linux-HA pacemaker.
For larger deployments, CTDB offers better features to scale & load balance, while the pacemaker can do extra checking of the underlying services rather than just an IP address.
Today we’ll look through the keepalived window; simple but effective.
Install the daemon and edit /etc/keepalived/keepalived.conf on each node, with a vacant/reserved IP address.
yum -y install keepalived
On Node1
vrrp_instance VI_Gluster {
interface p2p1
state MASTER
virtual_router_id 248
priority 100
virtual_ipaddress {
XX.XX.XX.248/24
}
On Node2
vrrp_instance VI_Gluster {
interface p2p1
state BACKUP
virtual_router_id 248
priority 99 # MASTER 100
virtual_ipaddress {
XX.XX.XX.248/24
}
Enable & start the service
systemctl enable keepalived && systemctl start keepalived
Be sure to set the interface correctly for each node. I’ve used the newer Fedora syntax here.
Once the additional IP on the primary node has been verified, we can stop keepalived and watch it fail-over to Node2.
This will also prevent the keepalived VRRP assigned IP from interfering with creation of the ovirtmgmt bridge, during the next stage of the hosted-engine install.
To connect to the hosted engine VM during the setup and install you’ll need access to a vnc client.
A Fedora installer iso will also be needed, I used Fedora-20-x86_64-netinst.iso.
The screen app is not required, but follows the recommended approach.
The script will normally detect the correct CPU Type for you.
The CPU’s of your nodes should ideally be identical, but if they differ, you’ll need to select a mutually acceptable CPU Type; typically that of your oldest CPU. Naturally they will need to be both Intel or both AMD.
This part was not obvious, I had to search through the python code to find the correct syntax for the available CPU types.
/usr/share/ovirt-hosted-engine-setup/plugins/ovirt-hosted-engine-setup/vdsmd/cpu.py
CPU_FAMILIES = (
{‘model’: ‘model_Haswell’, ‘name’: ‘Intel Haswell Family’},
{‘model’: ‘model_SandyBridge’, ‘name’: ‘Intel SandyBridge Family’},
{‘model’: ‘model_Westmere’, ‘name’: ‘Intel Westmere Family’},
{‘model’: ‘model_Nehalem’, ‘name’: ‘Intel Nehalem Family’},
{‘model’: ‘model_Penryn’, ‘name’: ‘Intel Penryn Family’},
{‘model’: ‘model_Conroe’, ‘name’: ‘Intel Conroe Family’},
{‘model’: ‘model_Opteron_G5’, ‘name’: ‘AMD Opteron G5’},
{‘model’: ‘model_Opteron_G4’, ‘name’: ‘AMD Opteron G4’},
{‘model’: ‘model_Opteron_G3’, ‘name’: ‘AMD Opteron G3’},
{‘model’: ‘model_Opteron_G2’, ‘name’: ‘AMD Opteron G2’},
{‘model’: ‘model_Opteron_G1’, ‘name’: ‘AMD Opteron G1’},
)
Hosted Engine Install
On node1
Installing the required oVirt components will create the vdsm account with UID 36 & the kvm group with GID 36.
Prior to using the new gluster brick, rights need to be set for the vdsm account & kvm group.
If installing remotely via ssh you will receive a warning when commencing the ovirt-hosted-engine-setup if you are not calling the install routines from within a screen session.
yum localinstall http://resources.ovirt.org/pub/yum-repo/ovirt-release35.rpm
yum -y install screen ovirt-hosted-engine-setup
gluster volume set engine storage.owner-uid 36 && gluster volume set engine storage.owner-gid 36
screen
ovirt-hosted-engine-setup
Answer the on screen questions, setting the storage as nfs using the keepalived floating IP.
E.g. XXX.XXX.XXX.248:/engine.
All proceeding well, you’ll be connected via VNC to the VM and be looking at the standard Centos 7 installation screen.
If not, you’ll want to take a close look at /var/log/ovirt-hosted-engine-setup to figure out what’s going wrong.
The minimal install is the recommended software selection.
Once the install is completed, select reboot to complete; which will close your vnc connection.
From the hosted-engine-setup menu, select option 2 to reboot the VM and continue the installation.
This option can be completed as many times as required.
Prior to installing the engine components on the hosted VM, I chose to modify /etc/hostname, set the IP statically, check the firewall settings & then rebooted to test.
Engine Setup
Supply the same admin password in the prior step.
sudo yum localinstall http://resources.ovirt.org/pub/yum-repo/ovirt-release35.rpm
sudo yum install -y ovirt-engine
sudo engine-setup
It may pay to open an ssh session to your engine & keep your eyes open for any firewall changes, they can cause problems.
Once complete, go back to your hosted-engine-install window on node1 and select option 1.
It will eventually tell you to power down the engine VM, and from there the HA & VDSM agents will take over and power the engine VM back up again.
I found my firewall rules on Node1 got unexpectedly overwritten here; I need spend some time to reproduce and possibly submit a bug.
On Node2
Perform the same process for Node2 as completed for Node1.
This time, after kicking off the ovirt-hosted-engine-setup, you’ll see a different message.
The specified storage location already contains a data domain. Is this an additional host setup (Yes, No)[Yes]?
With a mild sense of adventure, it should not be too difficult to navigate the remaining questions.
All going well, for all your efforts you should see something like this…
[ INFO ] Waiting for VDSM hardware info
[ INFO ] Connected to Storage Domain
[ INFO ] Configuring VM
[ INFO ] Updating hosted-engine configuration
[ INFO ] Stage: Transaction commit
[ INFO ] Stage: Closing up
[ INFO ] Waiting for the host to become operational in the engine. This may take several minutes…
[ INFO ] Still waiting for VDSM host to become operational…
[ INFO ] Still waiting for VDSM host to become operational…
[ INFO ] The VDSM Host is now operational
[ INFO ] Enabling and starting HA services
Hosted Engine successfully set up
[ INFO ] Stage: Clean up
[ INFO ] Generating answer file ‘/etc/ovirt-hosted-engine/answers.conf’
[ INFO ] Answer file ‘/etc/ovirt-hosted-engine/answers.conf’ has been updated
[ INFO ] Stage: Pre-termination
[ INFO ] Stage: Termination
Winding up Part1
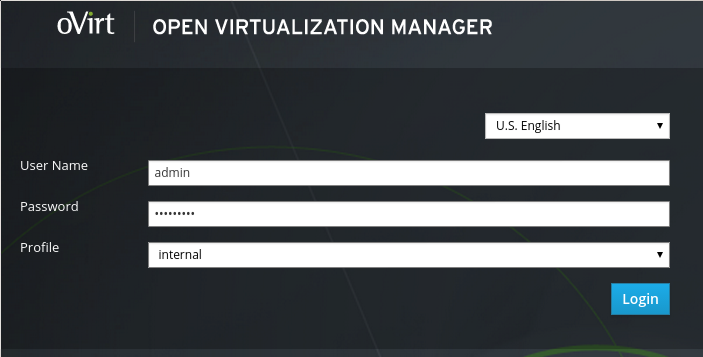
You should now be able to point your browser to a web port of you engine VM and see this…
Common problems
Additional NFS services can interfere with the component gluster NFS service.
selinux: while long term it’s a very good thing, it can make for hard to diagnose errors. Is it disabled?
Firewalls can also cause tricky problems as mentioned prior.
Logs can take you down mysterious paths to nowhere, while all the time it’s a simple port getting blocked.
When trying to debug firewall problems, along with tcpdump, it can help to add a line or two like this to the tail of your config just prior to reject.
-A INPUT -j LOG –log-prefix “DEBUG IN:”
-A OUTPUT -j LOG –log-prefix “DEBUG OUT:”
-A FORWARD -j LOG –log-prefix “DEBUG FWD:”
Careful cutting and pasting from web sites, character encoding can mangle characters during translation and break things.
References
Ovirt 3.5 Release notes
Migrate to Hosted Engine
Features/Self Hosted Engine
oVirt 3.4, Glusterized